FlexStow Snap Fit Box
Customizable snap-fit storage box with embedded TPU hinges and an assemble-while-printing two-material design.
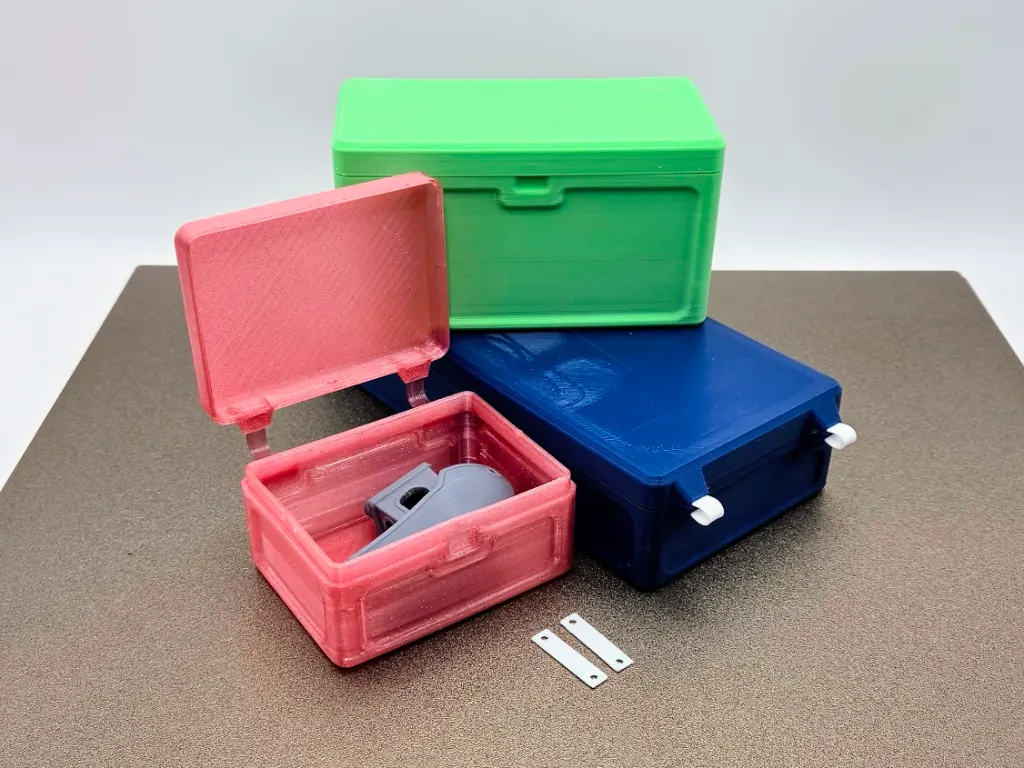
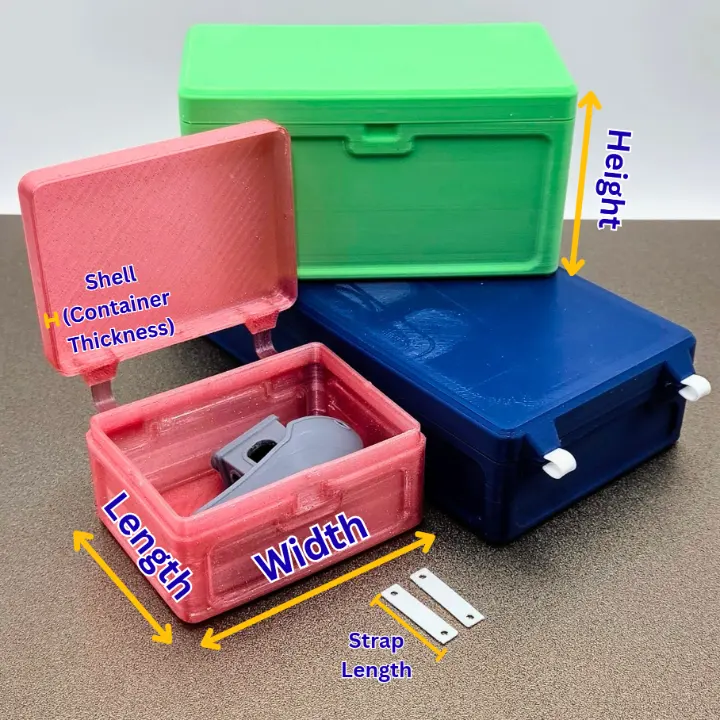
The FlexStow Snap-Fit Box is a customizable 3D printable storage container for hardware, electronics, cards, tools, and other small items. Set the exterior length, width, and height to create anything from a compact parts box to a larger purpose-built container.
Flexible TPU hinge straps are embedded during printing, creating a durable mixed-material hinge without screws, pins, glue, or traditional post-print assembly.
The box also features a secure snap-fit closure, customizable dimensions, and separate files for straightforward multi-material printing on a standard single-extruder printer.
Printing Tips
Printing Technology: FDM
Layer Height: 0.2 mm
Perimeters: 4
Infill: 10%
Infill Pattern: Gyroid
Recommended Material: PLA, PETG, ABS, ASA for container, TPU for hinges
Supports: No
Support Type: None
Assembly Instructions
- Set the dimensions. Enter the desired exterior length, width, and height in the customizer.
- Generate the files. Download the customized container and TPU hinge strap models.
- Print the hinges first. Slice and print the hinge straps in TPU, then remove them from the build plate.
- Slice the container. Use PLA, PETG, or another suitable rigid material for the box and lid.
- Locate the hinge bridges. In the slicer preview, find the two layers where printing begins to bridge over the hinge openings.
- Add two pauses. Insert a pause immediately before each of those bridge layers begins.
- Insert the lid hinges. At the first pause, place one end of each TPU strap into the hinge openings in the lid.
- Check the fit and resume. Make sure the TPU sits completely flush and does not bulge above the surrounding surface, then continue printing.
- Free the lid at the second pause. Carefully peel only the lid from the build plate. Do not remove or shift the build plate, or the remaining print may lose alignment.
- Connect the box and lid. Position the lid beside the container and insert the exposed ends of the TPU hinges into the remaining hinge openings.
- Check the hinges again. Confirm that both straps are fully seated, flat, and not protruding into the path of the nozzle.
- Resume and finish. Continue the print so the final bridge layers permanently capture the TPU hinges inside the box.
Customize Model
By using the customization software, you agree to our Privacy Policy, Terms of Service, Disclaimer, EULA, and Cookie Policy.
Measure twice, customize once.
Something doesn't look right, or not sure what a setting means?
Download your design
Choose a file below and open it in your slicer. For designs with several components, download every part you need. Original files use the design defaults; your customized files appear here after generation.
Original files use the font saved in the design. To choose an available font for a new result, use Font at the top of Customize. Design default keeps the saved font.
Legal Disclaimer:
The files provided here are for personal, non-commercial use only. Redistribution, modification, or commercial use is not allowed without prior written consent from Lunar Prototypes.
Batch runs are a 3-step flow. You can revisit any step at any time.